We’re introducing two updates designed to simplify how you work in Roivenue, both focused on reducing repetitive steps and making attribution easier to understand.
What’s new at a glance
-
All attribution settings now include in-product “How it works” explanations
-
You can set custom weights for any source, medium, or campaign, and test attribution changes over time
-
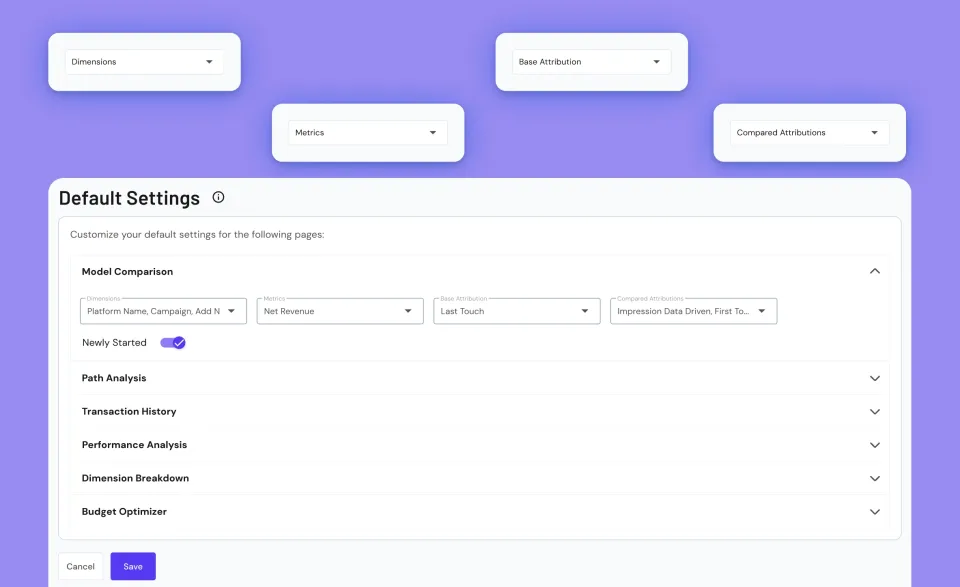
Each user can define their own default dimensions and metrics for every page
-
No more reconfiguring views, Roivenue remembers your preferred setup
Two Updates to Make Your Work Easier
Attribution Model Settings: Now Easier to Understand and Customize
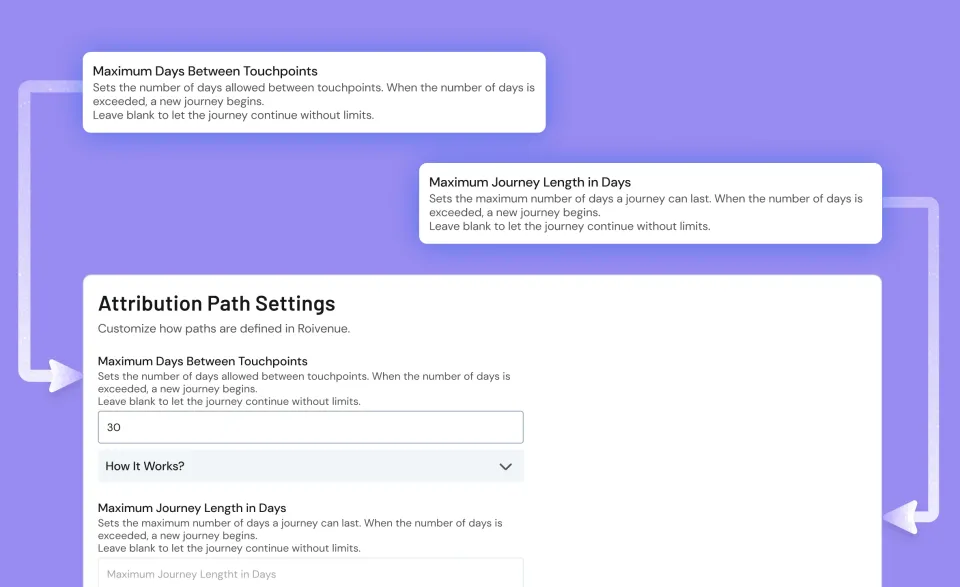
Most users are already familiar with the AI Data Driven attribution model path settings in Roivenue, such as the maximum number of days between touchpoints or how long a customer journey can last. For those using Roivenue Measurement, it is also possible to adjust how strictly touchpoints should be stitched together across sessions and devices. These features have always been available, but in reality, many teams avoided them. Without clear guidance, it was easy to feel unsure about what each setting actually changed.
To solve this, every setting in the attribution panel now includes a short explanation called “How it works”. These notes appear directly in the interface and explain what each setting does and when it might be helpful to adjust it. You no longer have to rely on documentation or wait for a support call to understand the impact of a change.
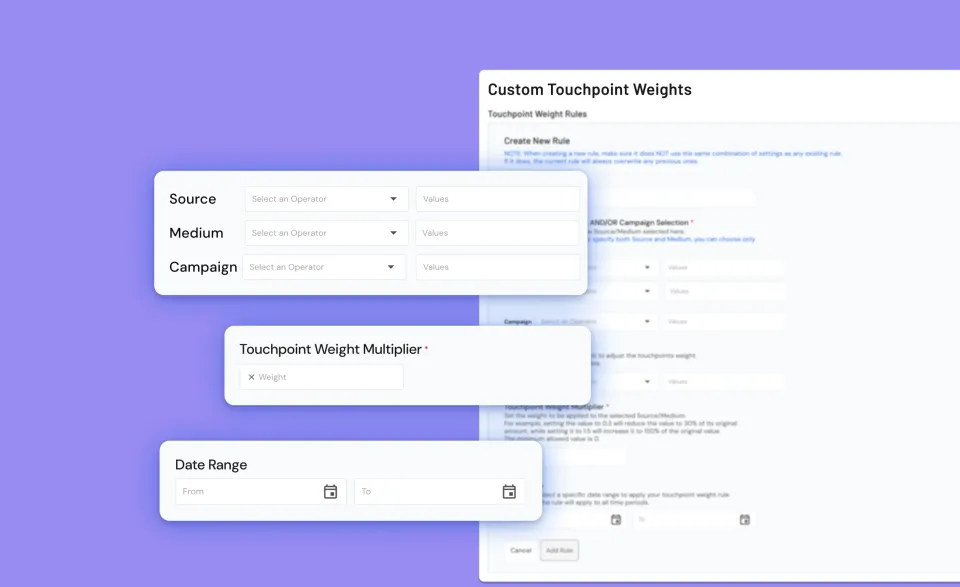
Alongside these improvements, we are also introducing Custom Touchpoint Weights. This feature gives you more precise control over how different types of interactions contribute to the final conversion. Rather than completely excluding Direct or Organic traffic, you can now increase or reduce the weight of any source, medium, or campaign. This is particularly useful when you want to test the role of upper-funnel or assistive channels.
How the new attribution settings can be used in practice
A retailer wants to see if upper-funnel channels, such as programmatic display, play a bigger role than their current model suggests. These campaigns usually generate impressions rather than clicks right away, but many users later return through search or direct visits.
To explore this, the team updates its attribution model by giving Display Impressions 25% more weight. With the new model, they also adjust their budget: since display now gets more credit, they put more spend into programmatic and reduce it elsewhere. This is the key step – shifting spend based on what the new model shows.
They then wait two to four weeks, depending on how long the typical customer journey takes, so the results have time to appear in the data.
When enough time has passed, they analyze performance using the new model only. They apply it both to the test period and to a previous period to make the comparison fair. If the cost per conversion improves, they keep the new settings. If it doesn’t, they don’t just stop; they run further tests, adjusting weights or budgets again until they find a setup that works better.
Define your own default views for faster reporting
The second update is focused on improving how you work with data in your day-to-day reporting. In Roivenue, many users rely on custom dimensions or optimize for different business goals. Until now, they had to make the same adjustments every time they opened a report. Whether it was switching from the default dimension to a custom one or replacing Net Revenue with a conversion-based metric, these repeated steps added up.
With Default Settings, each user can now choose which dimensions and metrics should be displayed by default on each page. Once saved, your selection will be applied automatically, so reports always open in the format that fits your needs. These settings are saved at the individual user level and do not affect other members of your team.
This change is especially useful for agencies and larger teams. If you work with multiple clients or projects, you can configure the view for each one separately without interfering with your colleagues’ setups. Whether you need to focus on campaign performance, qualified leads, or another key metric, Roivenue now adapts to the way you work.
Why You Will Love This
Both updates are already available in the Roivenue application. You can find the attribution improvements under the Attribution Models page, and the default view options in your User Menu.
Together, these changes make attribution easier to understand and give you more control over your daily workflow. You can test ideas with confidence, spend less time adjusting views, and focus more on what matters – making smarter decisions based on the data in front of you.
45 minutes on relevant demo data, with a summary for Finance.